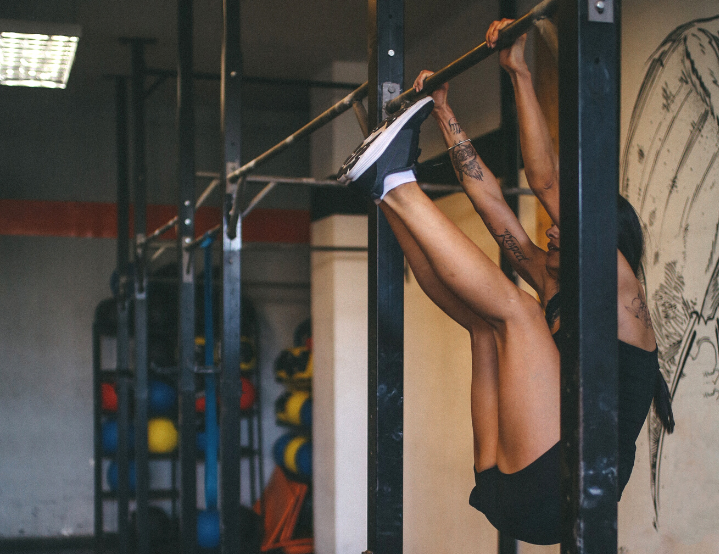
What are Toes to Bar?
The “toes to bar” exercise is a gymnastics movement commonly included in CrossFit WODs. The exercise consists of hanging from a pull-up bar and bringing your toes up to touch the bar, as demonstrated in the video below (Video #1). They are typically performed with a kip but can also be done strict. Toes to bar improve core, upper body, and lower body strength. In this blog, we’ll go over the major points of performance for toes to bar, as well as common faults. Then, we’ll discuss progressions and accessory work that can help you get your first toes to bar or refine your technique.
Toes to Bar Points of Performance
Hands Just Outside Shoulder Width
Generally speaking, your hands should be positioned slightly wider than shoulder width apart on the pull-up bar. However, if this doesn’t feel right for you, try going a bit narrower or wider. There is no one “right” position, so find what is most comfortable for you!
Full Grip
When gripping the bar, both palms should face forwards. Your thumbs can sit over the top of the bar with the rest of your fingers or wrap under it. Wrapping your thumbs under the bar creates a more secure grip, but this, too, is based on personal preference.
Start with Elbows Extended
Elbows must be completely locked out at the start of the repetition. Arms should remain straight throughout the entire movement.
Initiate Kip Swing with Shoulders
Remember that the kip swing is achieved by moving between the hollow and arch/“superman” positions. The core and lower body muscles should be engaged to help assume each position, but let the shoulders initiate the movement. Think about pulling your shoulders back and pressing your chest forward to initiate the arch position. To switch to the hollow position, press down on the bar, keeping your straight arms and letting your chest propel backwards.
Lift Feet Towards Bar
Once in the hollow position, there are two techniques to bring your toes up to the bar:
- Keeping the Legs Straight as You Lift – As you press down on the bar and your chest moves backwards, swing your legs up toward the bar. Keep them straight the whole time. This technique is demonstrated in the first minute of Video #1 (included above). While more efficient once perfected, keeping the legs straight requires significant hamstring flexibility, quad strength, and core strength. Therefore, this technique is more often used by very advanced CrossFitters and gymnasts.
- Bending the Legs as You Lift – Many athletes instead chose to bend their legs. As you press your arms down and your chest moves back, tuck your knees up to your chest. Then, while keeping your knees close to your chest, extend your knees to kick your toes up to the bar. This is shown from 1:00-1:04 and 1:08-1:12 in Video #1 as well as throughout the video below (Video #2).
Feet Touch Bar Between Hands
Both feet must contact the bar for the repetition to count.
Feet Return to Starting Position
Lower the legs down to return the feet to their starting position. Both feet must pass behind the plane of the pull-up bar before the next rep can be initiated. There are multiple ways to do this depending on if your legs are straight or bent:
- Keeping the Legs Straight as You Lower – After your toes touch the bar, begin to lower your legs down while keeping them straight. Pull your shoulders back and press your chest forward as you resume the arch position. This is demonstrated from 0:00-1:12 in Video #1.
- Bending the Legs as You Lower – Once your toes touch, lower your feet to resume the tucked “knees to chest” position. Then, start to lower your legs with bent knees and begin to pull your shoulders back/press your chest forward. Once your feet pass behind your body, straighten your legs to resume the arch position. This technique is featured from 1:12-1:15 in Video #1 as well as throughout Video #2.
Common Faults with Toes to Bar
Not Pressing Down on the Bar
Pressing down on the bar with straight arms as we swing into the hollow position helps us move our torso behind the bar. This creates space for our legs to rise. Think of your body like a pendulum: when the chest comes back, the legs go forward, and vice versa. It also engages our latissimus dorsi muscles (aka “lats”), thereby increasing our stability and promoting a more controlled swing.
Head Tilted Down
Tilting the heads down causes the upper body to cave inward, reducing our shoulder range of motion and limiting our ability to get a full swing. Keep your head neutral or tilted slightly up (no more than a 45-degree angle).
Massive Swing Initiated by Legs
Often times, when trying to bring our feet up to the bar, we tend to just swing our legs as hard as possible, then let them flop back down. In doing so, we lose all tension in our upper body, core, and lower body. We end up swinging uncontrollably instead of returning to the arch position, which is needed to transition into another next rep. Instead, initiate the movement from the shoulders and keep the core engaged for a tighter, more controlled swing. This will help us return to the hollow and arch positions needed to connect one rep to the next.
Toes to Bar Progressions
If you can’t do toes to bar yet, or would like to improve your technique, check out these progressions!
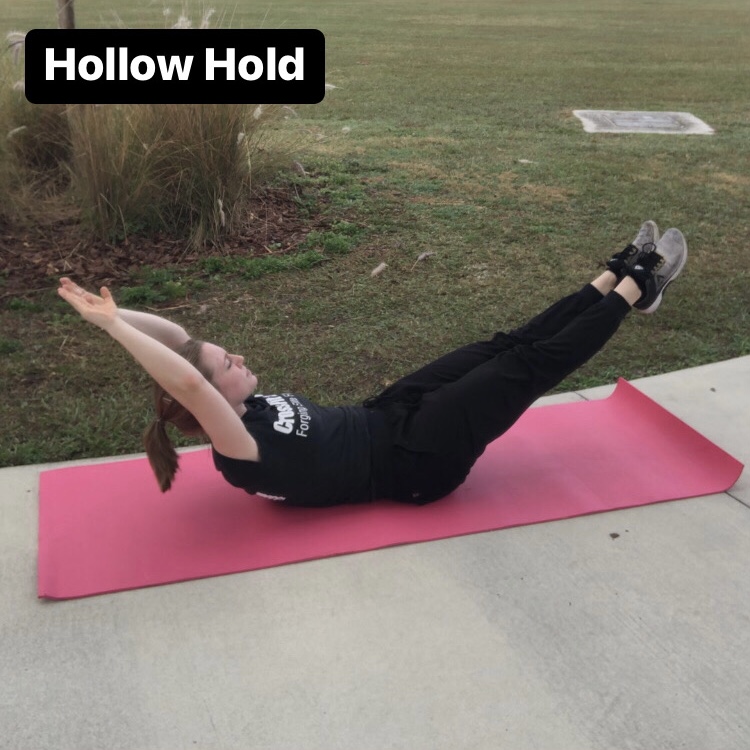
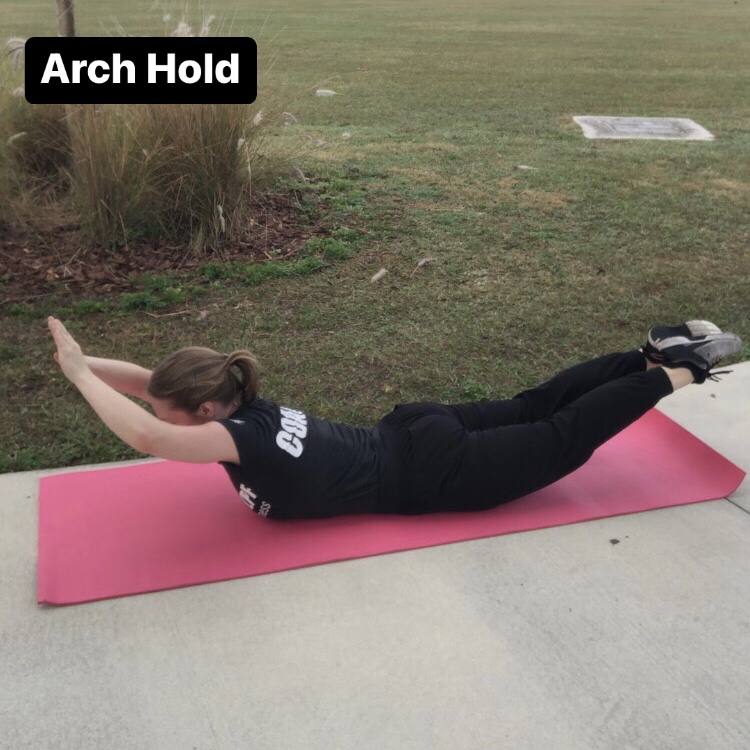
Hollow Hold/Arch Hold
The hollow and arch positions are the foundations of the kip required for toes to bar. Practice holding each of these positions on the ground to develop the strength and body awareness to assume them. For the hollow hold, remember to keep your low back pressed into the ground. For the arch hold, actively squeeze your glutes, hamstrings, and upper back muscles rather than just arching your lower back. Try doing a Tabata-style workout, where you hold one of the positions for 20 seconds and rest for 10 seconds. Shoot for 4 rounds of each position!
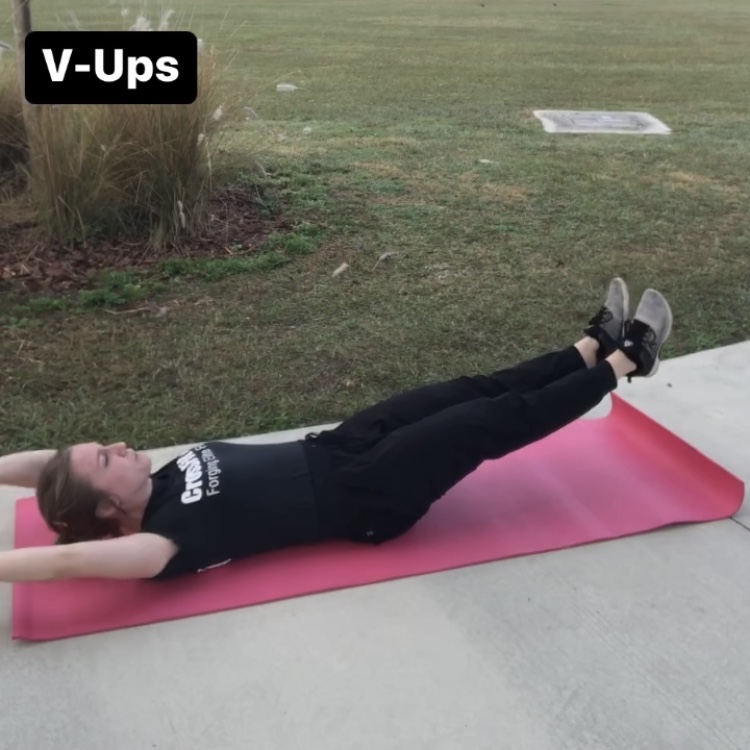
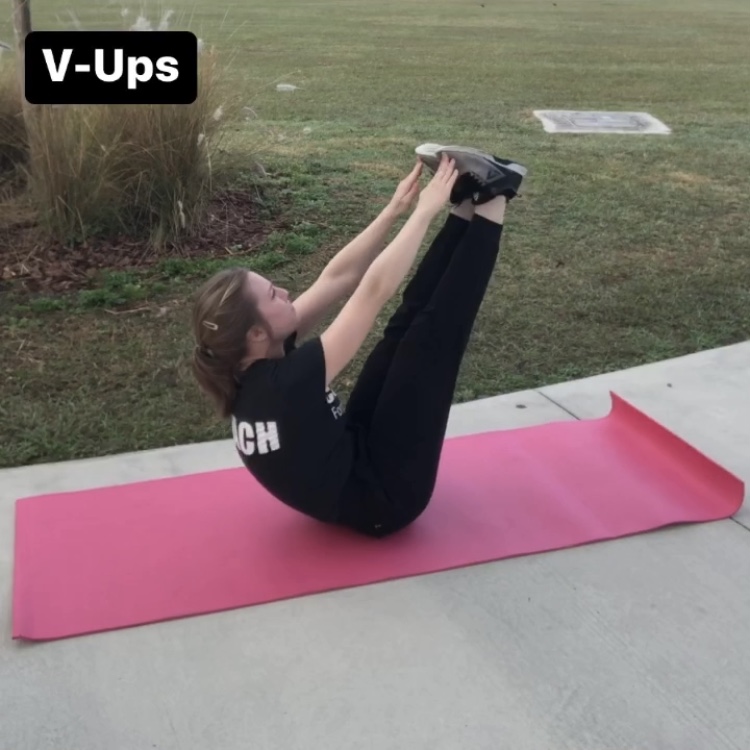
V-Ups
Lie on your back with both arms overhead. Activate your core, pressing your low back into the ground. While keeping your legs straight, lift both feet several inches. This is your starting position. Then, simultaneously bring your arms and feet towards each other, folding your body up like a V. Return to the starting position without letting your feet touch the ground. The goal is to touch your toes when performing these, however you can start with reaching for your knees or shins if needed! This motion strengths your abs, incorporates the hollow position, and mimics the motion of the toes to bar.
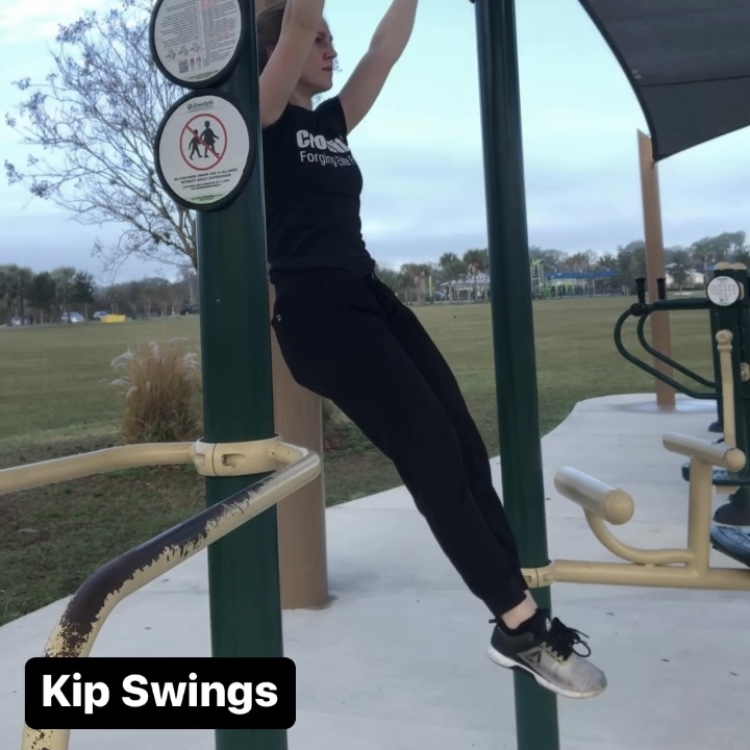
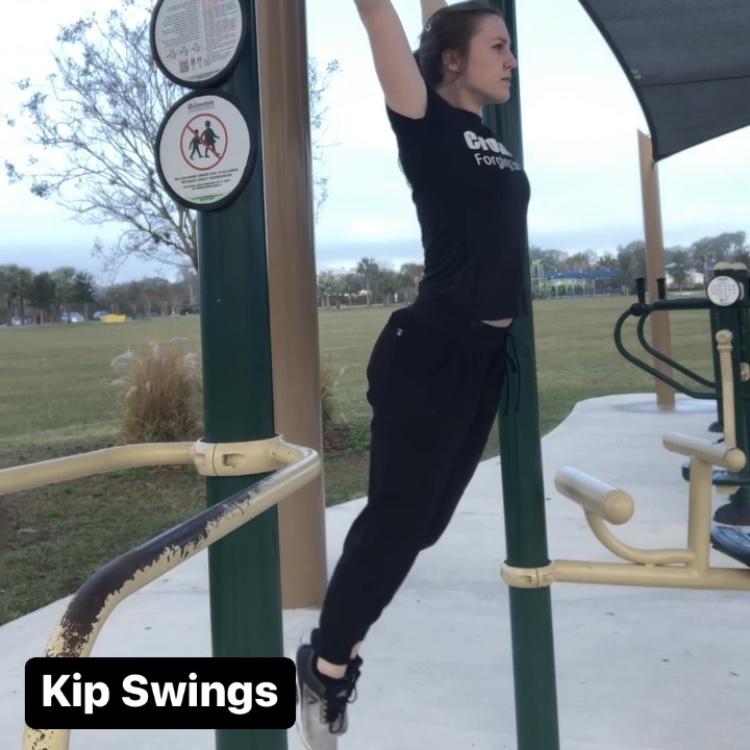
Kip Swings
Practice your kip by hanging from the bar and switching between the hollow and arch positions. Remember to keep your arms and legs straight and initiate the swing with your shoulders. Press down on the bar in the hollow position and bring your chest through in the arch position.
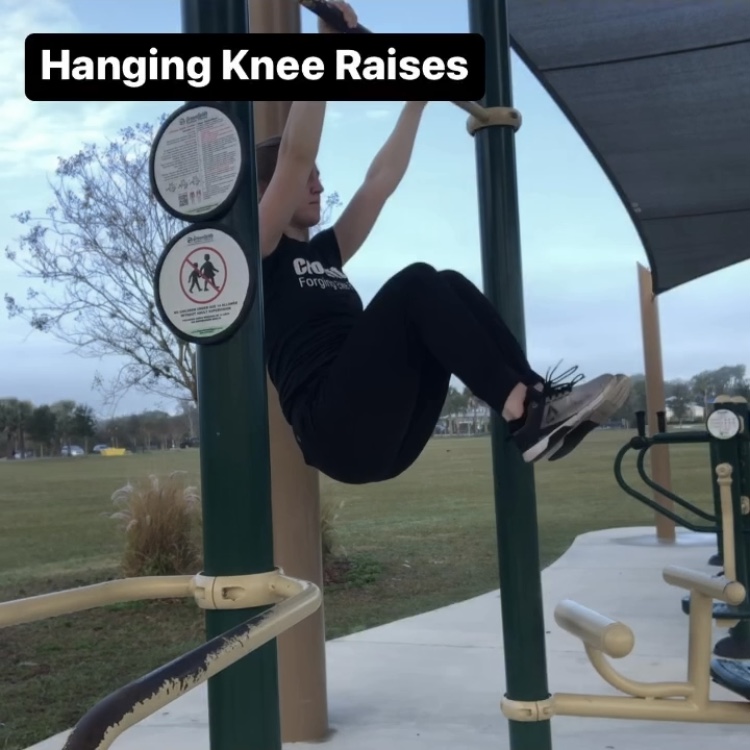
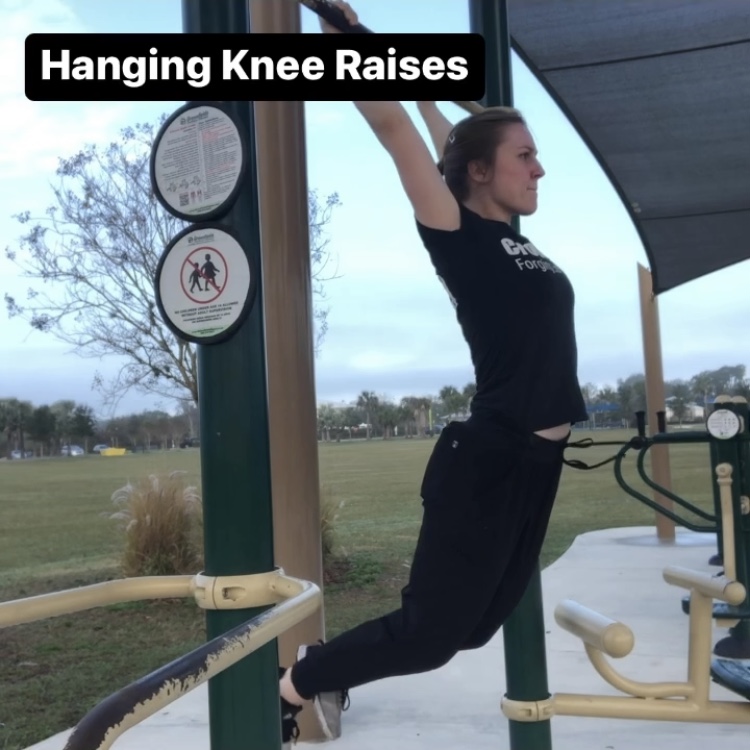
Hanging Knee Raises
As you move into the hollow position of your kip swing, raise your knees up towards your chest. As you lower your legs back down, drive your heels back behind you to extend into the arch position.
Single Toes to Bar
Nail doing one rep at a time with excellent form before trying to connect multiple reps. Come off the bar in between reps and rest before rushing into another one.
Connecting Toes to Bar
Once your singles are looking stellar, work on stringing two together. As you get stronger and more proficient with the movement, progress to doing more reps per set.
Accessory Work to Help with Toes to Bar
If you can do toes to bar but you’d like extra accessory work to hone the skill, try these exercises!
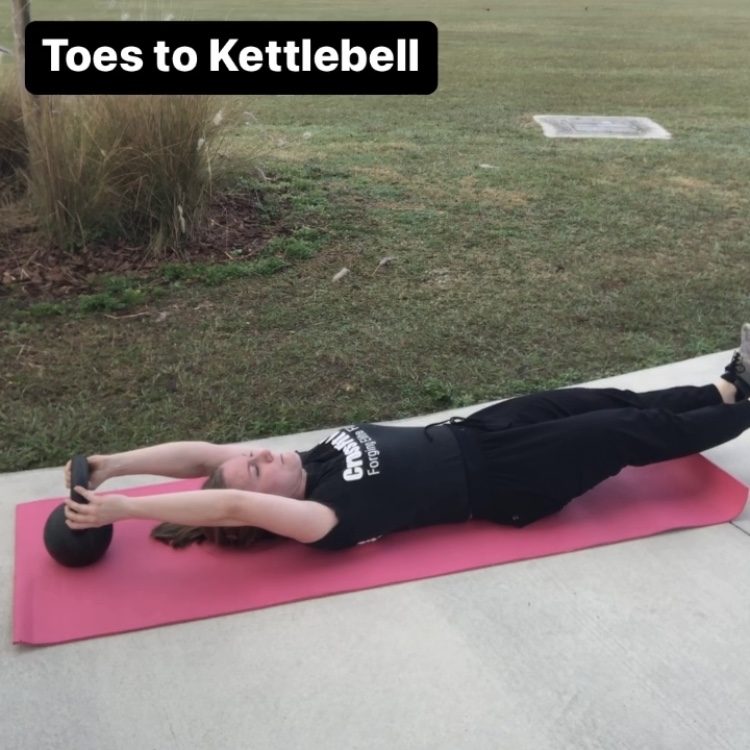
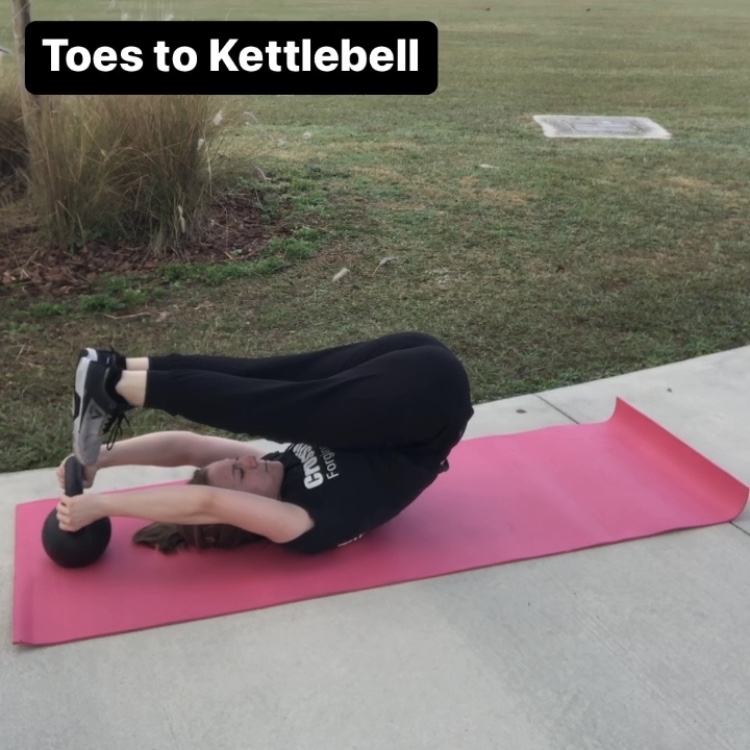
Toes to Kettlebell
Lie on the ground with a kettlebell positioned behind your head. Grip the handle of the kettlebell with arms locked out. Activate your core and, with straight legs, raise your toes up to the kettlebell. Lower them back down with control. This is an introduction to strict toes to bar and is excellent for increasing core and lower body strength.
Strict Toes to Bar
Once you can complete toes to kettlebell, try doing strict toes to bar. Kipping movements are always safer and more efficient when we have the underlying strength to perform them strict. Here’s a great video demonstration of the movement from CrossFit HQ.
Hamstring Mobility
Tight hamstrings can make it hard to raise your feet all the way up to the bar. Good news: stretching can help! Grab a long towel and lie on your back. Loop the towel around the ball of your foot. Holding one end in each hand, slowly pull the towel to lift your leg up, keeping the knee straight. Raise it up until you feel a tolerable stretch down the back of your leg. Hold for anywhere from 30 seconds-2 minutes on each side.
Start Working on Toes to Bar Today
Now that you’ve learned all about toes to bar, it’s time to do them! Take 10 minutes before or after your class or pop into Open Gym to try some of these drills. You can also schedule a one-time or recurring Personal Training session to work one-on-one with a coach on this skill. We know you’ll be crushing them in no time!