
What are Calluses and Rips?
Calluses
Calluses are hardened, thickened areas of skin that form over parts of our bodies that experience a lot of friction. You can think of them as little coats of armor, protecting the more fragile tissues that lie underneath. As CrossFitters, we often develop calluses on our hands given the high volume of weightlifting and gymnastics we do. They are commonly located at the base of our fingers and on our palms.
Rips
“Rips” are small wounds that form when superficial layers of skin are torn off by excessive friction. CrossFitters’ hands often rip after doing a lot of hanging knee raises, toes to bar, pull-ups, muscle-ups, or barbell cycling. These rips are typically very tender to the touch for several days until they heal. Our skin is most susceptible to rips when we either have no calluses or when we are not taking proper care of calluses that we do have.
In this blog, we will discuss how to manage calluses to prevent formation of injuries like rips, as well as what steps to take if our hands do rip.
Routine Callus Maintenance
Trim/Shave Calluses
When calluses build up and become too big, they can catch on barbells or pull-ups bars and eventually rip. Therefore, we need to smooth them down so that they are flush with the rest of our skin. This should generally be done right after showering, bathing, or thoroughly washing your hands with warm water so that the skin is more supple. Using a pumice stone or electronic file, buff the excess skin until you are left with a smooth, flat callus. Alternatively, you can use a callus shaver or cuticle trimmers. This process should be painless as you should only be removing rough, dead skin. Never grind/cut back to raw tissue. Perform daily or as you notice significant callus buildup.
Moisturize
Dry hands are more susceptible to cracks and therefore more susceptible to rips. Be sure to moisturize with a good lotion regularly. This is especially important if you live in a drier climate or are frequently exposed to dehydrating substances such as antibacterial soaps, cleaning products, or hand sanitizers.
Extra Tips to Avoid Ripping
In addition to the routine callus maintenance addressed above, try these tips to reduce the likelihood of ripping mid-workout:
Adjust Your Grip
When performing many repetitions of any movement that involves gripping, try adjusting your hand placement slightly throughout your sets. This can redistribute pressure across different parts of your hands to reduce chances of ripping. When using a pull-up bar or kettlebell, trying positioning the bar/bell more in your fingers than in your palms. For more information about hand placement, check out our blog on Different Grips Used in CrossFit!
Wear Grips
Many CrossFitters chose to add an extra layer of protection between their hands and the bar via gloves or “grips.” These WOD Nation Grips are a popular choice and consist of a piece of flexible leather that covers the palms. They have a Velcro wrist strap at one end and two finger holes at the other to secure them in place while you complete your WODs. Another option are these Bear KompleX Grips, which are slightly more expensive but supposedly more durable as they are instead made of carbon fiber. Lastly, for athletes who want to enhance the ability to “feel the bar” through the grip, check out these more minimal-style JAW Grips. All grips listed here come in a variety of sizes and can be great options for athletes looking to avoid ripping!
Don’t Overuse Chalk
While chalk is great at absorbing moisture to improve our grip, it can also excessively dry out our hands. As discussed above, this increases our chances of ripping and can also make existing rips worse. Apply chalk as needed, but don’t go overboard. Ensure that you wash your hands thoroughly and moisturize after using chalk to prevent unnecessary skin dehydration.
How to Treat a Ripped Hand
No matter how perfect our calluses and hand care routine may be, no CrossFitter is guaranteed to be safe from ripping. When the (annoyingly) inevitable hand tears finally happen, here are some guidelines for how to heal:
Clean the Wound
First, clean the wound with soap and water as soon as possible. This will help clear out dirt, blood, and bacteria that may be collecting in the area. Fair warning- this is going to sting, but it is ABSOLUTELY necessary to reduce risk of infection.
Remove Excess Skin
Once the wound is clean, carefully remove any loose/dead skin that has peeled off the hand with clean nail clippers, cuticle cutters, or scissors. This should be completely painless. Be sure to only remove dead, separated skin and leave all healthy tissue intact.
EXCEPTION- This DOES NOT apply to blood blisters! If deeper layers of skin are damaged but the most superficial layer is left intact, blood may pool and form a bubble under the skin. DO NOT attempt to pop blood blisters or remove the top layer of skin. If the blister is intact, dirt and bacteria cannot get into the wound. If the blister pops on its own, you should then proceed to remove the excess dead skin as described above.
Topical Medicines
After cleaning the wound and removing dead skin, apply an antibacterial cream such as Neosporin if available. This will replace the skin’s natural oils to keep it hydrated and help reduce risk of infection.
Bandage
Next, cover the wound with a fresh bandage to keep it clean and prevent it from drying out. Change as needed.
Avoid Grip-Intensive Exercises
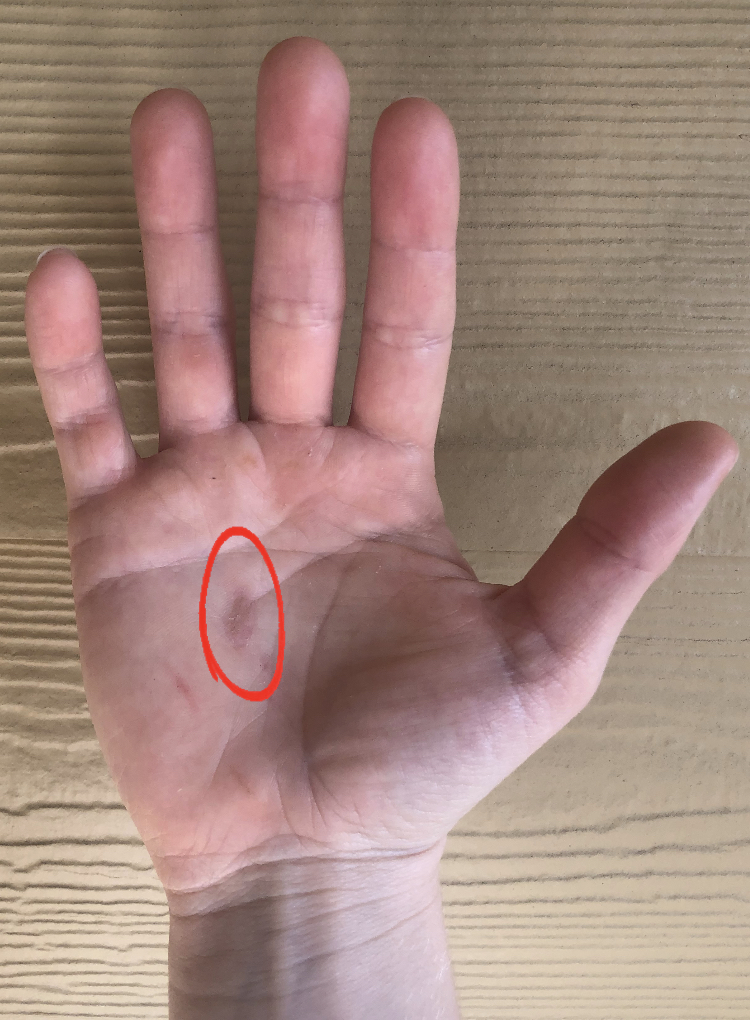
We don’t want to cause further damage to the rip by doing a bunch of grip-intensive exercises right away. Give yourself some time to heal. You can continue to work out as long as you modify movements as needed to protect your hands. The tissues should be strong enough to return to most activities in anywhere from a couple days to one week. (See photo below for a rip after one week of healing)
Tape Method
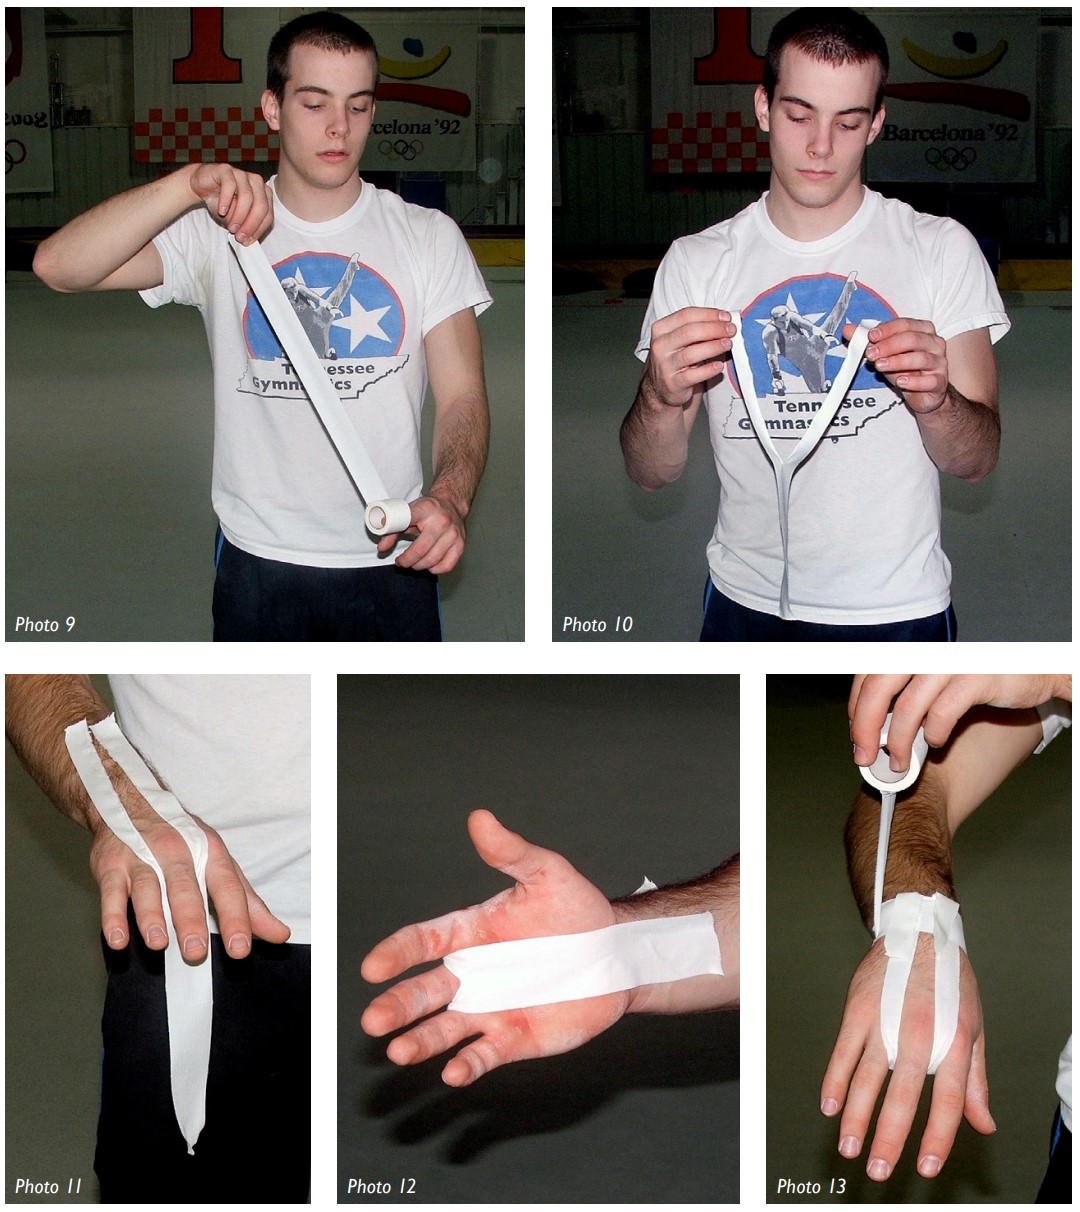
If you need a sturdy way to keep rips covered while they heal, try this taping method from elite gymnastics coach Phil Savage. First, cut a long piece of tape up its center from one end to its midpoint (Photos 9/10 below). Secure the cut portion along the back of your wrist and stretch it up towards your fingers. Wrap the split pieces around the base of your finger that is closest to the rip (Photo 11). Then, fold the un-cut half over the rip and secure it on the inside of your wrist (Photo 12). Lastly, wrap a second piece of tape around your wrist to lock the first piece in place (Photo 13).
Callus, Rip, and Hand Care Takeaways
Let this article be a reminder to treat the recovery of your hands with as much seriousness as you treat the recovery of the rest of your body. Proper hand care is vital to ensuring that we can live to WOD another day. Remember that a few minutes of callus maintenance and moisturizing goes a long way! Additionally, keep in mind that, despite our best efforts, rips can still happen. Hopefully these tips will make the recovery process as smooth as a well-shaved callus.
*We receive no benefits from promoting any products discussed in this blog. We just like sharing good finds!