Air squats, otherwise known as bodyweight or unweighted squats, are considered the “cornerstone movement of CrossFit.” That’s because they form the foundation for countless other exercises we routinely perform. The front squat, back squat, clean, snatch, wall ball, and thruster are all weighted variations of the air squat. We can also look beyond the gym and see variations of the air squat in everyday life, like when we get off the couch and sit on the toilet. These examples highlight just how functional and important this exercise is. In this blog, we’ll first discuss proper form for completing an air squat. Then, we’ll cover tips to improve your technique, how to modify this movement, and how it can be incorporated into your workouts.
Beginner’s Guide to Air Squats: How to Do an Air Squat Correctly
Set Up: Shoulder Width Stance
A good starting position for most people involves standing with their feet in line with their shoulders. However, some individuals may need to widen or narrow their stance a bit, so feel free to experiment here. The best width will always be one that allows you to squat as low as possible without discomfort or loss of form. Once you find the optimal stance, maintain this position throughout the entirety of the squat.
Set Up: Toes Pointed Forwards
Feet should be parallel to each other with toes pointed forwards. It’s acceptable for the toes to point slightly outwards if needed, but try not to exaggerate this too much. Keep your feet in this position throughout the whole squat.
Set Up: Knees in Line with Toes
Your knees should always be in line with your toes. This means that, if your toes are pointed forward, your knees should also point forward rather than cave in towards each other or spread super far apart. This alignment can get tricky to sustain once the squat begins. Therefore, it’s very important to nail this position while setting up for the movement.
Set Up: Weight Through Whole Foot
Distribute your weight evenly through your heels, the base of your pinky toe, and the base of your big toe. Pushing into the floor with these three points balances your body weight over the middle of your feet. This will help prevent your body from tipping forwards or backwards during your air squat.
Squat: Hips Descend Back and Down
The squat begins by pushing the hips back. Then, the knees bend to allow the hips to descend towards the ground. Your knees should still be in line with your toes and your bodyweight should still be balanced over the midfoot.
Squat: Neutral Spine
Your back should be flat, or “neutral,” as you descend, at the bottom, and as you rise in the squat. We want to avoid letting the upper and/or lower back round, as this distributes forces unevenly onto the spine. Tighten your core muscles and keep your chest upright to maintain a neutral spine.
Squat: Hips Below Knees
Continue to descend in the squat until your hips pass just below the level of your knees. This is known as squatting “below parallel,” meaning just beyond the point where our hips are parallel with our knees.
Stand: Full Hip and Knee Extension
After reaching the bottom position, it’s time to stand up. While maintaining the same points of performance as before (knees in line with toes, weight through whole foot, and neutral spine), drive your hips back up. The air squat is complete when your hips and knees are fully extended.
Tips to Improve Your Air Squat
Knees Caving In
If your knees collapse in towards each other at any point during your squat, think of the following cues.
- First, during your set up, imagine screwing your feet into the floor. Push your feet down into the ground and drive your knees out, keeping the toes pointed forwards. This “screwing” motion will help activate the muscles on the outsides of your hips. This creates tension and stability that can keep your knees in line with your toes.
- Second, as you rise from the bottom of the squat, squeeze your glutes. Using these muscles will also assisting in preventing the knees from caving in as you ascend.
Back Rounding
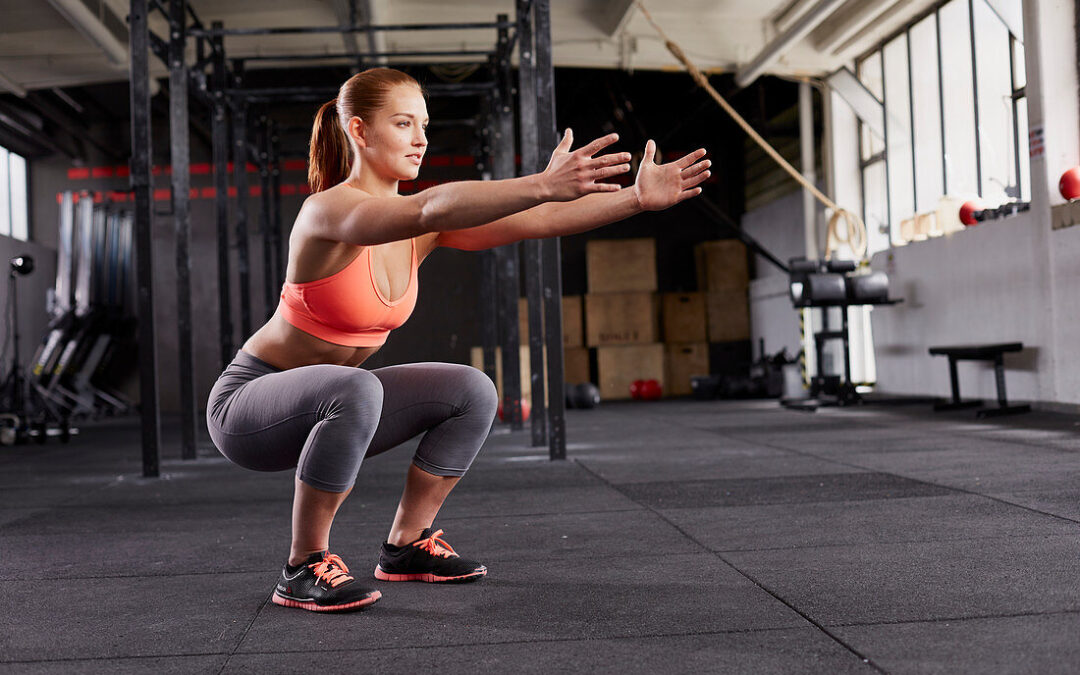
Are you struggling to maintain a neutral spine during the air squat? Try raising your arms out in front of you as you descend. This brings your back into a flatter position and promotes keeping your chest upright.
Trouble with Depth
Not everybody is able to squat below parallel right away and that’s okay! Use a low box, a stack of bumper plates, or a wall ball to establish a target depth. Stand in front of your target when you air squat and descend until your bottom taps it. This ensures that your depth is consistent during every rep and can be adjusted as needed. This is an excellent modification to strengthen your muscles in a range of motion that’s functional for you.
Lacking Hip Mobility
Performing an air squat requires a lot of movement in the hips. If you have tightness in your hips that is limiting your squat, try foam rolling! Lie on the floor with a foam roller under any area of your lower body that feels tight. This can include muscles on the front, back, and sides of your hips and thighs. Slowly move up and down over the foam roller until it finds a tender spot. Then, spend at least 2 minutes rolling back and forth over this area until it starts to loosen up. Focus on breathing and relaxing the muscle you’re working on. Repeat over all tender spots.
Lacking Ankle Mobility
Many athletes struggle with air squats due to a lack of mobility in one or both ankles. One possible cause of this could be tight calf muscles, otherwise known as the gastrocnemius and soleus muscles.
- To stretch the gastrocnemius, stand facing a wall. Prop the toes of one foot against the wall at a 45-degree angle. Keep your heel on the floor and knee fully straight. Then, lean your body towards the wall.
- To stretch the soleus, place one foot on the seat of a chair. Shift your weight forward, leaning your chest onto your thigh and allowing your knee and ankle to bend significantly. Let your knee pass over your toes while keeping the heel down.
Both stretches should cause a light-pulling sensation in the back of your lower leg. Each should be held for approximately 30 seconds and repeated 2-3 times.
How to Add Air Squats into Your Exercise Routine
How Should I Incorporate Air Squats in My Own Workouts?
It depends! Air squats can be a wonderful addition to any lower body warm-up. Aim for 1-2 sets of approximately 5-10 reps and focus on moving deeper into the squat with each rep. To incorporate them into the workout itself, increase the number of reps and sets until you achieve an overall volume that’s challenging but doable. If you are a beginner at air squats, start off with small sets and increase your repetitions over time. Always listen to your body and respect its limits.
How Are Air Squats Included in CrossFit Workouts?
One of the most famous CrossFit workouts to feature air squats is the classic “Hero WOD” entitled, “Murph.” This workout is done in memory of Navy Lieutenant Michael Murphy, who was killed while serving in Afghanistan in 2005. It consists of a 1-mile run, 100 pull-ups, 200 push-ups, 300 air squats, and another 1-mile run. Thankfully, “Murph” is a special workout that is only programmed at most boxes on Memorial Day. Your average WOD will typically consist of a much smaller volume of air squats. Doing them regularly in this manner can prepare you for a Murph-sized squat workout in no time!
Why You Should Do Air Squats
Air squats are a fantastic movement to add into your exercise repertoire. The benefits of bodyweight squats are seemingly endless and include improvements in lower body strength, endurance, power, and mobility. Proper execution of this movement establishes a solid foundation for many other motions performed in both CrossFit and everyday life. Master the air squat at CrossFit LPF and set yourself up for success in every progression and variation that follows!